
May DIY project
Now that spring is in full bloom, it’s a great time for your family to get crafty! These projects are super fun to do and add a great splash of color to your home. Bonus: they can be educational too. Do a quick online search about the life cycle of a butterfly or the different parts of a flower, and talk about them while creating. Sneaking education into crafts? Genius! So, grab the kids and the supplies, and create a stained-glass butterfly, paper tulips, or both.
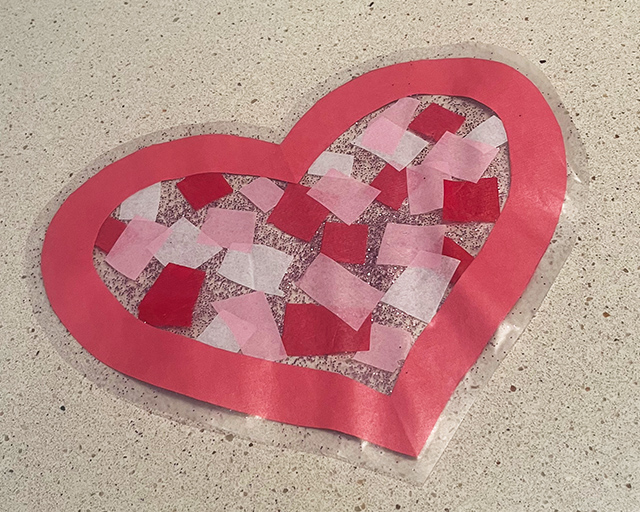
stained-glass butterfly

supplies needed:
· butterfly template (print it here)
· black construction paper
· tissue paper in assorted colors
· scissors
· clear self-adhesive paper
· string or yarn
· hole punch (optional)
what to do:
- After printing the template, cut out the butterfly along the outer black line. Then, carefully cut out the inside portion. An easy way to do this is to fold the butterfly in half and cut along the inside frame, leaving about ½- 1 inches of the butterfly shape. This will create the frame of your butterfly.
- Lay a sheet of adhesive paper, a little bit bigger than your butterfly, sticky side up on a table. Adhesive paper is VERY sticky, so handle with care.
- Place butterfly shape in the center of the adhesive paper.
- Cut tissue paper into small squares and place them in whatever pattern you like inside the butterfly frame. Make sure the paper overlaps slightly to create the stained-glass effect.
- Lay another sheet of adhesive paper over the top of the butterfly, and trim the excess around the shape of your butterfly.
- Punch or cut a small hole in one of the butterfly’s wings, and loop your string or yarn through it.
That’s it! Hang it in a window that gets plenty of sun and enjoy!
paper tulips

supplies needed:
· tulip template (print it here)
· green paper straws
· scissors
· assorted colors of construction paper
· glue or glue stick
· hole punch (optional)
what to do:
- Print out the tulip template and cut it out. Trace the tulip onto the paper. Repeat on as many colors as you’d like.
- Cut out each tulip.
- Fold the flower accordion style four times, and punch or cut a hole in the center of the template.
- Unfold the paper and run a straw through the holes.
- Using green construction paper, cut two leaves for each flower. Glue these to the bottom of each straw, wrapping the ends around the straw.
You’re done! Arrange them in a bouquet, use them in a collage or give them as gifts. So pretty!
Related Posts