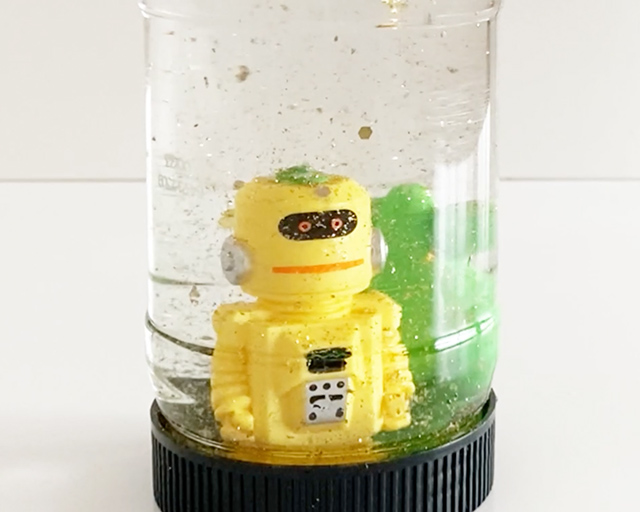


Want to bring some new life to your old plastic toys? Turn them into a fun art project with this DIY snow globe tutorial. Follow the instructions below to make your own winter wonderland.
supplies needed:
· peanut butter jar
· plastic toy(s)
· water
· sequins and/or glitter
· 1-2 tbsp. glycerin
· superglue
what to do:
- Remove any labels from your peanut butter jar. Scrub the jar clean both inside and out, then let dry.
- Take the lid of the peanut butter jar and glue your toy(s) to the inside of it. If the toy is smaller, you may want to glue a small piece of plastic below the toy to help give it height and then glue that to the lid.
- Take the empty peanut butter jar and fill it with water, then mix in about 1-2 teaspoons of sequins and/or glitter. Once stirred, add in 1-2 tbsp. glycerin.
- Screw the lid onto the jar tightly. Feel free to glue the lid on for added security. Flip over and shake for a snow effect.
Related Posts