
DIY crayon crafts
Here are two fun ways you and your kids can make crafts using their broken crayons. The easy part will be getting them to help you find as many as you can in your house or apartment; the more colors, the better. The hard part? Deciding which project to do – stained glass or rainbow crayons. We say do both!
Special note: Both projects use heat as part of the process, so be safe and keep an eye on your kids to keep them from getting an owie.
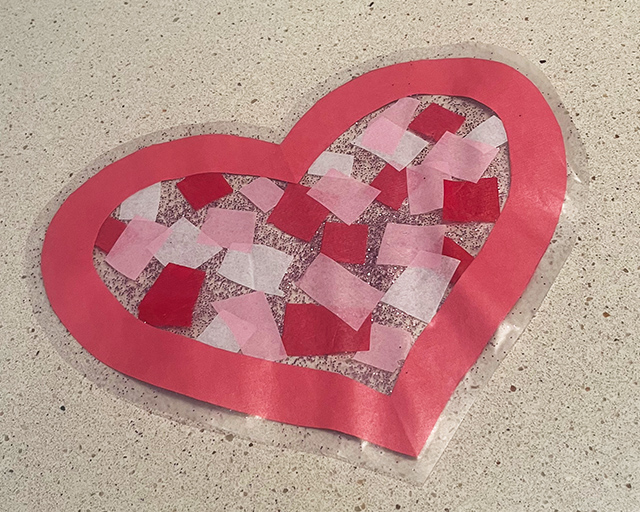
stained glass crayon art

These crayon-based versions of stained glass are even prettier when they’re hung on a window. The sunlight makes them glow like real stained glass.
download this project here.
supplies needed:
· broken crayons
· cheese grater or pencil sharpener
· wax paper
· aluminum foil
· iron
· newspaper, scrap paper or cardboard
· old dishtowel
· scissors or utility knife (optional)
what to do:
- Peel or cut the paper off the crayons using your fingers, scissors or a utility knife.
- Use the grater or sharpener to make crayon shavings. Try to keep the colors in their own piles or put them in small containers to keep them separate.
- Place a piece of 12″ x 12″ wax paper on top of the newspaper or box. The paper or cardboard will protect the surface you’ll iron on and help soak up any oil from the crayons.
- Let your kids create their design using the crayon shavings. You can show them examples of stained glass online or just let them use their imagination.
- Lay a second piece of 12″ x 12″ wax paper on top of their design and a piece of 12″ x 12″ aluminum foil on top of that. Cover with the dishtowel.
- Set your iron to low (no steam) and use it to melt the shavings. Check the art after a few minutes to make sure everything has melted. Iron again as needed.
- Put the art on a flat surface so it will cool off and the design can harden.
- Remove the top layer of wax paper and hang up their art.
rainbow crayons
There are a couple of ways you can make rainbow crayons. Ask your kids which one they want to make or see what works best with the supplies you already have.
layered rainbows
download this project here.

supplies needed:
· broken crayons in 4-6 colors
· 4-6 clean tin cans
· 4-6 empty pill or similar containers
· potholder
· scissors or utility knife (optional)
what to do:
- Remove the paper from the crayons with your fingers or use a utility knife or scissors.
- Break the crayons into small pieces and keep the colors separate.
- Add about 2″ of water to a medium-sized pan and heat on the stove until it’s boiling.
- Drop one color of crayon pieces into a tin can, then carefully set it down into the boiling water. The pieces should melt in 1-2 minutes.
- Using a potholder, pick up the can and slowly pour the melted crayon evenly into your containers. You now have the first layer of the rainbow crayons.
- Let the first layer cool until it hardens. You can also put them in the freezer to make them harden faster.
- Repeat steps 3-5 for each crayon color, using a new can each time.
- When the last layer has hardened, use a butter knife to carefully pop each beautiful rainbow out of its container.
- Hand them over to your kids. We bet they’ll want to color with them immediately.
blended rainbows
download this project here.

supplies needed:
· broken crayons
· metal muffin pan and liners or disposable muffin pan
· scissors or utility knife (optional)
· cookie sheet or aluminum foil (optional)
what to do:
- Remove the paper from the crayons with your fingers or use a utility knife or scissors.
- Break the crayons into small pieces and keep the colors separate.
- Preheat your oven to 250 degrees, then add liners to your muffin pan if you’re not using the disposable kind.
- Assign each kid their own muffin cup. Let them choose from the different colors of crayon pieces to add to their cup. Cups should be filled to less than half full to avoid boiling over.
- Bake for 10-15 minutes to melt the crayons. How long it takes will vary so watch them carefully. Put a cookie sheet or piece of foil underneath the pan to be safe.
- Remove the pan from the oven once the crayons have melted. Put it somewhere safe so the rainbows can cool and harden for at least 12 hours.
- Tear off the muffin liners and give your kids the finished blended rainbows. Just like the layered rainbows, we bet they’ll want to color with them immediately.
Related Posts